12.18.2012

Whimsy Onesie

It's only fair that the girls get one too, right?


The best part about this one is that the Christmas fabric is all on clearance. 

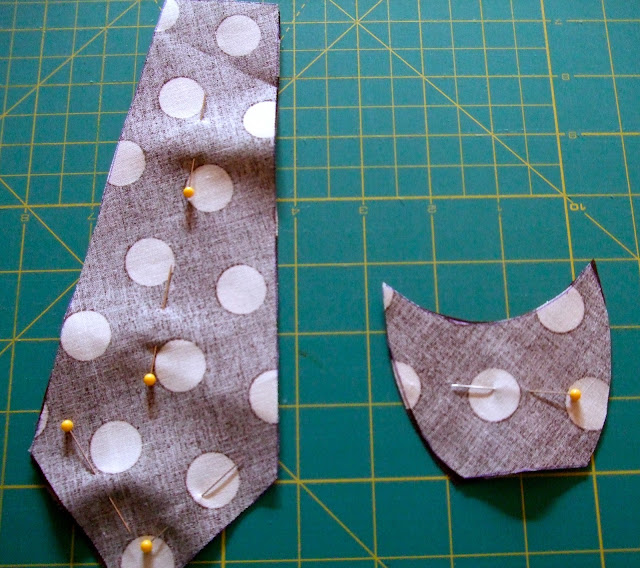
Here's my generic picture of what is needed. 


Just like the boy's tie onesie, I made double sides pieces just for a higher quality look.

Sew them right sides together and flip them around.


Once you like the placement, top stitch and add the button.


12.15.2012

Dapper Onesie

Who wouldn't want their ankle bitter to look this adorable?


Just kidding. He's a person and doesn't deserve to be called names. 

I received the request to make Liam a tie onesie for his first birthday. In addition to being a simple project, it is a great way to use up scrap fabric. 

Besides my sewing machine, here's what I used. 


I free-handed a tie pattern in two pieces. There are two tie sizes pictured so I could make a smaller one for a littler tot.

It took me a good five sheets of paper until I got one that I was happy with so don't be discouraged if yours don't look as amazing as mine on the first try.

You'll need two of each piece in order to sew them together for a more finished look. One piece would be okay, but there will probably be more fraying. If the onesie will be worn more than once, it should be double layered to withstand washing.

Trace the pattern onto the back of your fabric and cut out the shapes.


Pin right sides together. Sew together, leaving the top of the tie and the bottom of the knot part open to flip right side out.


Iron pieces flat and place on the onesie. I was able to fit the bottom part of the tie into the knot for a more seamless look, but if you can't swing that, just layer it with the knot on top.

Pin in place and top stitch.

Easy peasy. Lemon squeezy.


Perfect outfit for a comfortable holiday or New Year's.

Those of us without kids tend to get annoyed with others' offspring. It helps ease the pain if they look cute while they are screaming and flinging mashed potatoes across the table.

12.14.2012

Absentee

When I started this blog, I encountered a lot of critics (my husband) and heard comments such as 'you won't last long' or 'you'll get tired of it'. I can safely say that my absence has not been because I'm tired of anything, simply busy. 

Don't worry peeps. I'm back. 

At least until January 7th. When my next semester starts. 

Yuck. What I'm tired of is papers and threaded discussions. 

Just kidding, my dear professors. You're amazing and special individuals.

None of them read this. 

Besides school, and vacations of course, the Shaw household hasn't done a whole heck of a lot....

Except install this amazing new front door.

Oooohhh. Aahhh.


Here's a reminder of what now lays in our garage. 


Free if you want it. You know you do.

Sun bleached doors with a one way mirror from the 1970s are all the rage these days. Promise.

A shot of the workmen who did all the installation.


Completion. Halloween style.


I'd get you an updated holiday lights shot, but it's raining outside and I'm not that committed. 

Perhaps a beautiful, snowy picture. Oh wait, it doesn't snow in December apparently.

8.02.2012

How To Tutu

Most people want cute tutus for their toddlers birthday pictures. 

Not my friends. 

They want to roll in the mud.


I participated in the warrior dash as well. Sans tutu though.

It kicked my arse. In a good way. Yikes.

(Photo courtesy of Lanie B Photography)
Regardless, let me show you how to make these gems. What you choose to do with it is solely up to you.


Collect:
1inch elastic tape
tule 

Easy right?

The amount of tule you'll need depends on how full you want to skirt to be and if you want it to be long or short. I always have the theory of 'buy more, return later'... which the husband loves. 

Disclaimer: I thought that the glittery tule was awesome. Turned into a glitter mess. Turned out well, but I'm still vacuuming glitter out of my carpet. 


Measure the waist of the wearer. Subtract three inches and cut your elastic tape.

Bold type means pay attention. Don't forget this step or it'll be too big.


Sew the ends together.


Measuring the tule is completely subjective. Figure out how long you want the tutu to hang from the waist. Take that measurement and double it. That will be how long you should make your cuts.

I wanted mine to hang about twelve inches so I cut the strips around 24 inches. No need to be exact.


Put your elastic band around something that is similar in diameter. 

Make sure you don't have it stretched out too far or it will become too large for the waist you measured.  If you are making it for a child, placing it around your thigh or a rolled up blanket may work best. 

Fold the tule in half and knot as shown. 


Repeat in whatever color pattern tickles your fancy.


Make sure you have something dreamy to watch. Like this guy.


Who doesn't love Grey's Anatomy reruns?

Maybe mix it up and watch Michael Phelps win some more medals. Who doesn't love medals?

He sure does.


7.09.2012

Wedded Bliss

Tomorrow marks my parents' 36th wedding anniversary.

Who wouldn't want these goons as their role models and genetic precursors...


Given the option, I'd pick them all over again. That's got to mean they did something right.


Be proud of your love for one another and the family that it has built. 

We all are. 

Happy Anniversary! 

6.15.2012

Easy Kiddo Quilt


I'm a sucker for a sale....

Regular price - $4.99
Sale price - $4.95

SOLD!

I mean think of all those things I could do with the four pennies saved. Endless possibilities really. 

Honestly, I'm not THAT bad although I did find this fabric on sale and had to put it to use. 


Put an adorable hoot owl on something and I'm out the door with a bag over my arm. 

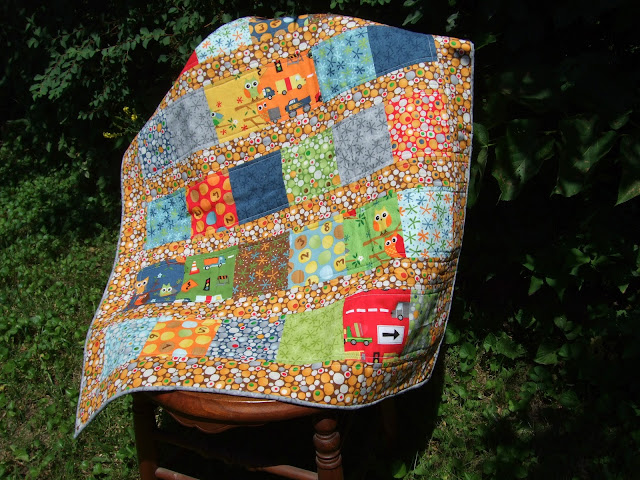
I made this simple baby quilt and did the quilting myself to save some dough. 


Wanna be cool and crafty like me?

You'll need
- 1 Charm pack (mine is Ten Little Things from the Moda brand)
- 1 yard of coordinating fabric for the backing
- 2/3 yard for borders
- 1/3 yard for binding (this may be a little generous but it depends on how thick you want the binding)

Lay out your squares in a pleasing manner. If you have a super keen eye, you will notice that I held some of mine back to make a coordinating taggie blanket.


Sew together your horizontal rows first.


Cut four 2.5 inch strips the width of your blanket.


Stitch them in there.


Since I had enough fabric left over, I did a 3 inch border all the way around the edges.

Layer your backing fabric, batting and top fabric.


I chose to quilt it myself to save a little dough. Dinero. Moolah.


Trim your edges clean and add the binding. I chose a neutral gray since the quilt is so busy.


Here's the taggie blanket to join.

4.06.2012

Easter Eggies

That's right folks. Easter is around the corner. Well, this weekend actually. 

I'll be spending it in Florida, but I wanted to make sure the house was a little festive since I'm leaving Ryan behind. 

I went with a paper mache type of Easter eggs, but with embroidery thread instead of paper. Another Pinterest find.


Hit up your local craft store for some embroidery thread. I went with the pastels (on the right) and my crafting buddy, Molly, went with the green and blues color scheme (on the left). 

It takes a whole skien per egg so buy away. Trust me, it's hard to choose once you get absorbed in that store isle. 


The paste comes from liquid starch and flour. 

Recipe:
One cup of liquid starch to half a cup of flour.


Should look a little like this once you whisk it together.

You'll also need balloons. We went with water balloons (not the best choice as you will come to see). Regular balloons may work as well as long as you don't blow them up to full capacity.


 Don't forget the wine and snacks. Uber important.


Let me share what our water balloon issue was...


They are IMPOSSIBLE to blow up.

Okay, maybe not completely impossible, but super difficult.

Just look at that face.


We even got this guy involved. 


Then we discovered the secret.

I know you all have one of those exercise balls that were all the rage about 5 years ago. Go dig out the pump for it.

Works like a charm.


We chose to do 18 balloons each. Once they are all blown up, dip your embroidery thread in the starch goo.

We started this project with gloves, but just get dirty. Works much better.

Unraveling the thread and just piling it in worked best for us. There will still be frustrating knots, but that's what the wine is for.


Wrap the balloons in a haphazard manner.


Lay your wet eggs on wax paper to dry. Ours took overnight so be patient.


Once dry, pop the balloons.

I took a straight pin and scratched off the majority of the left over starch bits. I'm a pretty big perfectionist and still couldn't bring myself to get them perfectly cleaned, but they just have a powdery look to them.


Hope everyone has a wonderful Easter!